by Terry Wieland
Not all our dreams come true and, were the truth known, it’s probably just as well. Since my teenage years, however, when I first started loading my own, I fantasized about having a properly designed, versatile, fully functional loading bench to replace the succession of kitchen tables and orange crates with which I was forced to make do for many years.
In 1985, I bought Jim Carmichel’s first Guns and Shooting Yearbook, an anthology of the best articles on those subjects that he’d found in various magazines. One was a piece by Wiley Clapp from Guns & Ammo about building a loading bench, complete with explanations, drawings, and a list of materials.
I was immediately hooked, and three years later, when I and my then-current spouse bought an old farmhouse and moved to the country, I assembled the wherewithal and built a bench to Wiley’s specifications. That bench traveled with me to three (count ‘em, three) different addresses as my marital and romantic situation evolved. While it is bolted to the wall and weighs a ton, it can be detached and moved.
In 2005, I gave that bench away, moved to the U.S., and set about building a second such bench, but without the mistakes in materials and workmanship that plagued the first one. Please don’t misunderstand: It worked perfectly well, but it could have been better…
The photos here are the second attempt — Bench, Mark II — which is vastly better than the first. Most of what you need to know can be deduced from the photos, but a little explanation is in order.
I don’t know whether Wiley figured most of his readers were dirt poor, or he just likes to pinch pennies, but his parts list left something to be desired. The design is first-rate, though, and I see no way to improve on it.
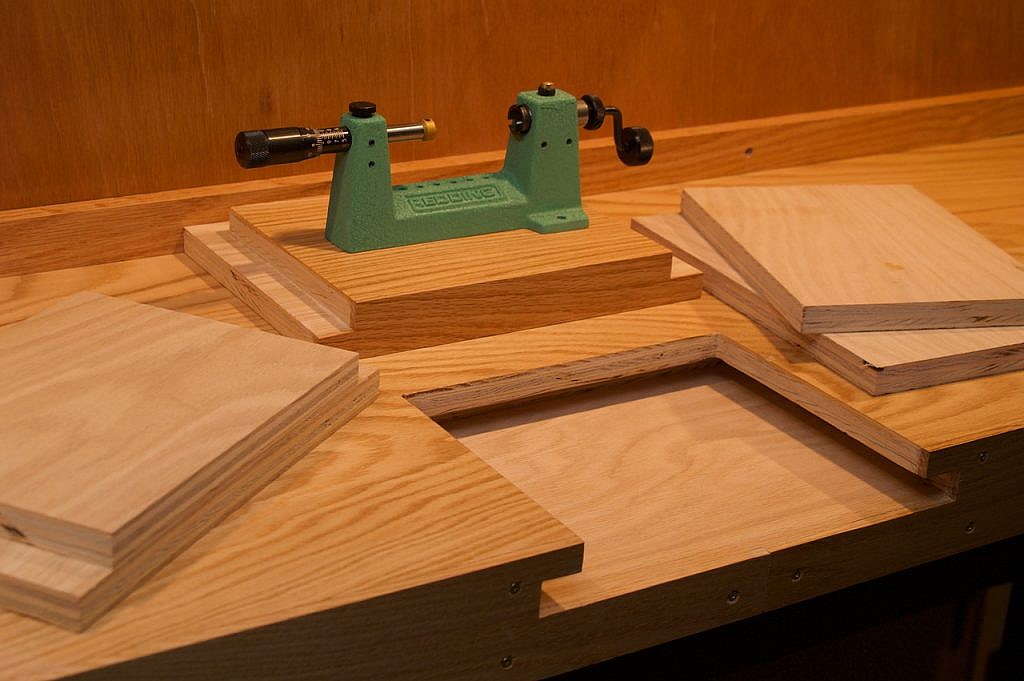
Essentially, the entire bench is built from two 4’x8’ sheets of ¾” plywood. Sawn into pieces, these provide four laminations, giving you a bench eight feet long, 18 inches deep, and three inches thick. Instead of having tools permanently attached to the bench, they are on wooden inserts which fit into cavities (see photo). When no tool is in use, blank inserts provide an uncluttered work surface.
Wiley Clapp recommended one sheet of good plywood, and a second of cheaper particle board to provide the middle layers. For me, this proved to be a big mistake because our ancient farmhouse cellar had damp stone walls and dirt floor, and a resident family of eastern king snakes. (The snakes are not part of this story, but I thought I’d mention them.)
The particle board was extremely prone to swelling with the dampness, which made the inserts a real problem. They required constant trimming with a rasp. (I will never use particle board for anything ever again.) Second time around, I invested in a sheet of top-grade oak plywood and one of good construction plywood.
Have the lumber yard cut each of them into two pieces, 18 inches by eight feet. (Wiley Clapp recommends 20 inches, but I made it 18 on the second bench.) This leaves two strips 1’x8’ which provide matching material for the inserts. I used oak for the top and bottom layers, with the utility plywood in between. As you can see, the top and second sheets need to be cut for the insert cavities (there are two) before the whole thing is glued together. The best way is to glue the bottom two layers, let it dry, add the third, and finish with the top layer.
The raw edges are covered with a strip of ¼” x 3” moulding. The back of the bench rests on an eight-foot horizontal two-by-four, bolted to the wall, which provides solid support. The front is supported by three legs made from steel pipe, bolted both to the bench and to the floor.
The left-over strips make about eight inserts, which fit snugly and are very strong. At last count, I have eight tools on inserts (including three presses). My most-used press is bolted on permanently, but that’s just convenience.
There is not room here to give all the specs and instructions, but the Guns & Shooting Yearbook (1985) can be found on Amazon. For not much money, you get three dozen excellent articles. Wiley Clapp’s is “A Well-Planned Loading Bench” and that says it all, because it certainly is.
______________________________________________________________________________
Gray’s shooting editor had other dreams aside from a loading bench, some of which even came true. But the bench was among the most gratifying.